 1 / 7
FREE FILE
Self-Watering Planter with Water Level Indicator
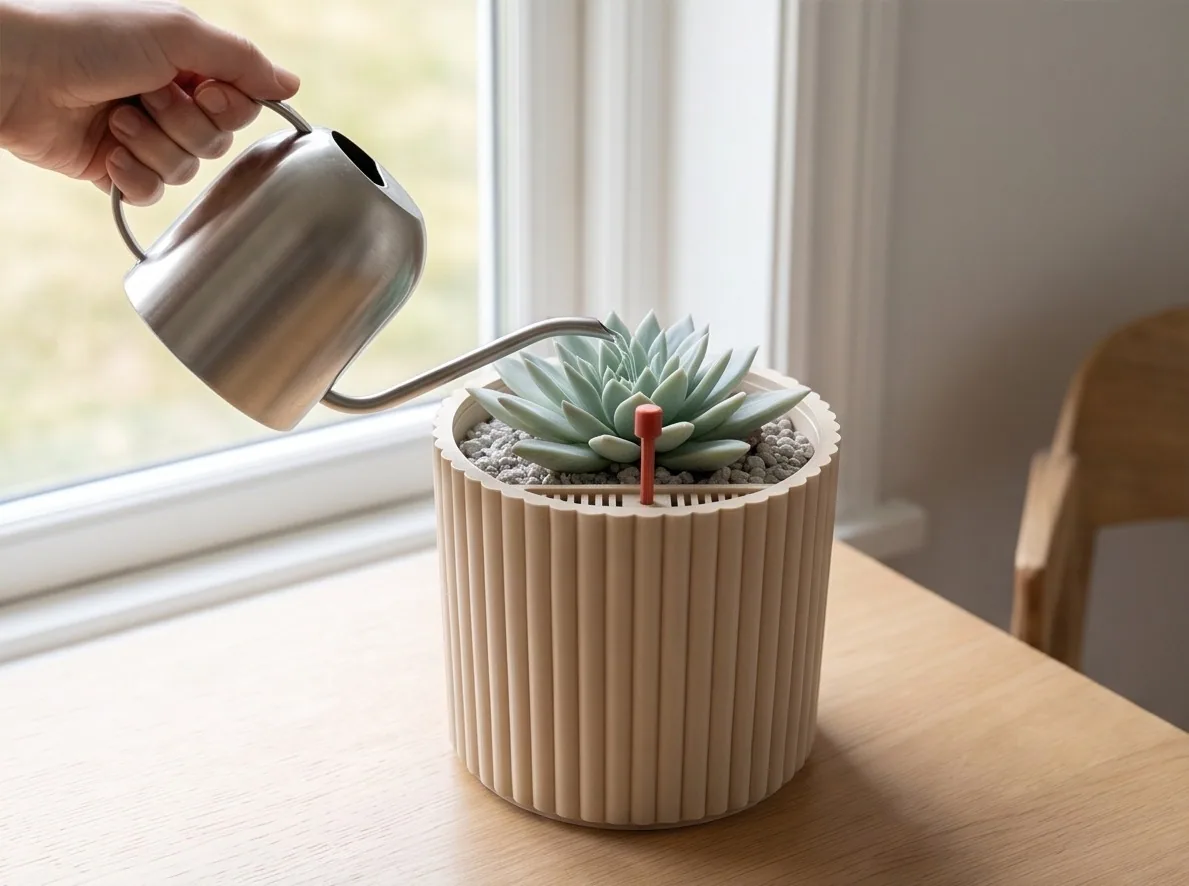
A ceramic-look fluted planter with a hidden reservoir, a slotted fill grate and a floating indicator that shows when to water.
planterself wateringself-watering planterwater level indicatorflower potsucculent
↓ Download free (15 files)
Personal use. Want to sell prints? Commercial license.
♥ Show some love
Every free file takes days to design. If this one made you smile, buy me a coffee. ☕
Tip from $2Commercial license · $5
Sell printed copies of this design (Etsy, markets, your shop). One-time, forever.
Get licenseDetails & print settings
A calm, fluted planter that waters your plant for you – and tells you when it needs a refill.

HOW IT WORKS
- The outer pot is a water reservoir. The planting insert hangs on its rim, and its soil-filled foot stands in the water: the soil wicks the water up by itself – no string wick needed.
- Pour water through the slotted grate on one side. The grate sits 1.8 mm below the rim in a small basin, so water stays in and drains straight into the reservoir – no need to lift the plant.
- A float with a red indicator cap shows the water level: cap sitting down on the grate = time to refill, cap standing high above the rim = full.

SIZES
- S: Ø 93 mm, 88 mm tall, ~150 ml water, cap 5 mm → 22 mm above the rim
- M: Ø 124 mm, 113 mm tall, ~350 ml water, cap 5 mm → 34 mm above the rim
- L: Ø 156 mm, 138 mm tall, ~700 ml water, cap 5 mm → 45 mm above the rim

PRINTING – NO SUPPORTS (0.2 mm, 0.4 nozzle)
- Reservoir: upright · 4 walls (the wall is 1.8 mm) · 6 bottom layers · 15 % infill · PETG is ideal for water, PLA works too
- Insert: upside down as provided (rim on the bed) · 4 walls · 15 % infill · the grate prints as a short bridge (10–15 mm), no supports needed
- Float: flat · 3 walls · 0 % infill · 5 top / 4 bottom layers – it is hollow and floats
- Rod: lying flat
- Cap: upright · print it in red or orange so it is easy to see
Sliced in Bambu Studio without any warnings. Estimated print time for the M set: about 6 h 40 min, 195 g.

ASSEMBLY
1. Drop the float into a bowl of water – it must float.
2. Push the rod into the float and secure it with a drop of super glue.
3. Place the float in the reservoir, then lower the insert so the rod passes through the small round hole in the grate.
4. Push the red cap onto the top of the rod (a drop of glue).
5. Fill the foot of the insert firmly with soil, plant, top with gravel, water from the top once.
6. From then on, pour through the grate until the cap stands high. When it sits on the grate again, refill.
Files
- L/fluted_planter_pro_L_float.stl 140 KB
- L/fluted_planter_pro_L_indicator_cap.stl 20 KB
- L/fluted_planter_pro_L_indicator_rod.stl 1 KB
- L/fluted_planter_pro_L_insert.stl 936 KB
- L/fluted_planter_pro_L_reservoir.stl 6855 KB
- M/fluted_planter_pro_M_float.stl 139 KB
- M/fluted_planter_pro_M_indicator_cap.stl 20 KB
- M/fluted_planter_pro_M_indicator_rod.stl 1 KB
- M/fluted_planter_pro_M_insert.stl 882 KB
- M/fluted_planter_pro_M_reservoir.stl 5074 KB
- S/fluted_planter_pro_S_float.stl 136 KB
- S/fluted_planter_pro_S_indicator_cap.stl 20 KB
- S/fluted_planter_pro_S_indicator_rod.stl 1 KB
- S/fluted_planter_pro_S_insert.stl 832 KB
- S/fluted_planter_pro_S_reservoir.stl 3911 KB